Wondering how to fix Christmas lights? The illuminations for your home are part of the magic of the season, and discovering a problem with a bulb, a section, or the whole string will definitely leave it short on festive sparkle.
But the good news is that fixing fairy lights is a task you can tackle yourself so you can enjoy Christmas lighting ideas all around your home without having to replace the sets you already own.
We’ve put together a step-by-step guide so you know how to fix Christmas tree lights, and you’ll find top advice from the experts here, too.
How to fix Christmas lights
It’s a problem many of us have encountered. The functioning string of Christmas fairy lights you tidied away last year doesn’t work at all this year. Or maybe it’s that individual bulbs aren’t working now you go to hang the string as part of your holiday decor. Either way, there’s no need to give up before you’ve even started if you know how to fix Christmas lights.
You will need:
1. Inspect the Christmas lights
This is an important step that should be carried out before you even plug in your Christmas lights, but it is important as it could reveal a problem that needs fixing before you try switching the lights on.
You’re looking for any issues such as cracks in the insulation of the wires or, worse, wires that are exposed. Take a look at the state of the plug as well.
Found problems like these? Then you should discard the string and replace it with a new set.
2. Check the fuse
Plug the Christmas lights in. Entire string not working? Check the fuses in the plug, and be aware that there might be two of them.
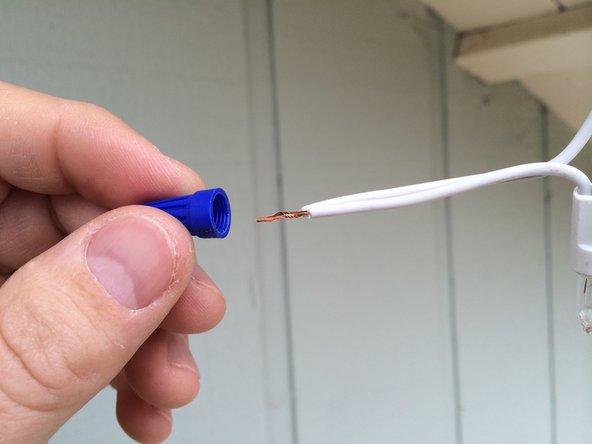
Using a small screwdriver, remove a blown version if this is the issue, and replace it with a new one. Make sure its rating is as shown on the plug.
3. Look for faulty bulbs
Wondering how to fix Christmas lights if the problem is that one bulb isn’t working?
First of all, check the problem isn’t a loose connection. Simply twist the bulb; if it moves then this may have been the issue and you can plug the string in to check if it now works.
If that wasn’t the problem, replace the bulb. Make sure you follow the rules on Christmas light safety and do so with a bulb with the correct voltage rating.
3. Mend a section of Christmas lights
Perhaps the problem is that a whole section of the lights isn’t working? ‘Christmas light strings share a circuit so when one isn’t firmly attached, it throws out the entire circuit which means the others aren’t going to light up either,’ explains Andre Kazimierski, CEO, Improovy.
‘Strings of at least 50 lights typically have between two to four circuits, which is why the whole string doesn’t go out.
‘Usually the culprit is a bulb that's come unseated from contact with the circuit,’ he explains. ‘This is easy to fix, but you need to be careful. It may be tempting to do this while the lights are plugged in to get quick feedback on what you’re doing, but you could electrocute yourself if you do this. Unplug the lights and check each bulb in the set that isn’t working. Make sure they’re screwed in tightly then plug the lights in again.’
4. Deal with a faulty shunt
The problem with Christmas lights may be a faulty shunt. Use the Christmas light repair tool available at Amazon as directed in the instructions. Test the lights by plugging them in.
If the lights still don’t work, you can use the tool’s detector according to the manufacturer’s instructions to locate the problem area, then replace the bulb here.
What causes a section of Christmas lights to go out?
‘There are many components that make up a light set and therefore there are many factors that can lead to failure,’ explains John DeCosmo, president of Ulta-Lit Tree Company.
‘The more common light sets work in series fashion, meaning each bulb depends on the rest. If one bulb goes out, the entire section becomes unlit. That doesn’t mean the entire section is bad or needs new bulbs, but it means you’ll need to find that one to get the rest illuminated.
‘Old LEDs often had corrosion issues due to weather elements building up within the socket and keeping the bulbs from making a proper connection. Alternatively, squirrels for some reason love the insulation on light set wires and often chew on them, causing a break in the circuit and a nonfunctional light set.
‘A consumer might also plug too many incandescent sets end to end blowing a fuse in the first set but giving the appearance that all of the following sets also don’t work because they won't illuminate.’
How do you know which bulb is out on Christmas lights?
You might be able to see which bulb is out on Christmas lights simply by looking. ‘You can identify which bulb on your string of traditional Christmas lights is out by looking for the bulb that is burned out or has lost its filament by looking at the tiny small filaments in the light bulbs,’ explains Imani Francies, home decor expert with USInsuranceAgents. ‘Frequently, the bulb will appear to be smoky as well.’
However, a bulb tester – or a tool that includes one of these, such as the LightKeeper Pro – is generally the simplest solution.
How can I fix Christmas lights without a tester?
A Christmas light tester is the preferred option but, if you don’t have a tester, it is still possible.
‘Start by visually inspecting the bulbs, making sure each bulb socket has one,’ says John DeCosmo. ‘There should be no missing or broken bulbs if you want to get this section to illuminate. Inspect the wires to make sure there are no breaks or exposed internal wiring.
‘Next, you’ll move on to testing bulb by bulb to ensure the bulbs are good. A functional section on that light set, assuming it has one, can be utilized as a bulb tester by simply removing one bulb and using that empty bulb socket to plug in a questionable bulb. If once entered, the bulb and the rest of that section illuminate then we have a good bulb.
‘While testing the bulbs, you’ll also want to visually inspect the sockets to ensure everything looks good in there and that there are no obstructions. If you have any issues, be sure to unplug the light set before attempting deeper analysis or repair.’


