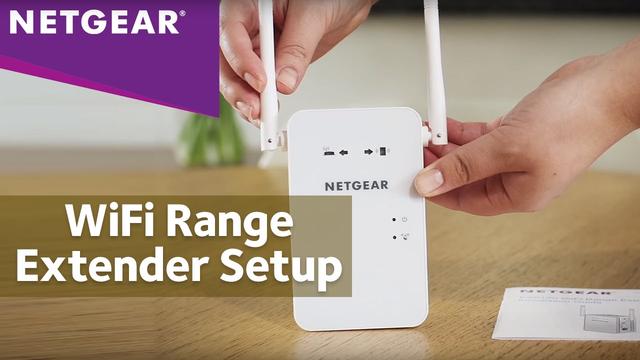
With so many of us now working from home, or just bingeing on Netflix and YouTube because of lockdown restrictions, it’s easy to find that your home Wi-Fi network starts to struggle with all that online activity, even if you have one of the best wireless routers money can buy.
Many people are buying new routers, and even expensive mesh networking systems, in order to improve their home Wi-Fi, but a simple range extender can often provide a more affordable solution.
2. Getting started
Regardless of which room you plan to use it in, you’ll start the set-up process with the range extender being plugged in and sitting as close as possible to your main router.
Modern routers and range extenders now have a WPS button (‘Wi-Fi Protected Set-up’) that creates a two-minute window in which the two devices can connect to each other without needing your Wi-Fi password.
That’s the quickest option for getting started, but you’ll still need to use the manufacturer’s app to complete the initial set-up, so we’ll go through the full process using the app here.
3. Connecting the Wi-Fi range extender
Before you launch the extender’s app, just go into the Wi-Fi Settings panel on your smartphone or tablet.
Our normal router is called 0606 Hyperoptic, and you can see that it transmits Wi-Fi on both the 2.4GHz and 5.0GHz bands. You can also see that the range extender is transmitting its own wi-fi signals - again on the 2.4GHz and 5.0GHz bands - called TP-Link_Extender_2.4GHz and TP-Link_Extender_5GHz.
If you used WPS to get started, you may already be connected to the range extender. Alternatively, you can just tap on TP-Link_Extender_2.4GHz to connect your smartphone to the range extender.
4. Dual-band Wi-Fi
Now that we’ve connected our smartphone to the range extender, we can launch the TP-Link app. Most manufacturers will ask you to enter an email address and password in order to create a private account.

The app will then scan the area and show all the other Wi-Fi networks that it has detected. The app will probably start with the 2.4GHz band, and you can see our 0606 Hyperoptic 2.4GHz router network right at the top of the list. We now need to select the router’s 2.4GHz network so that the app can link the router and the range extender together.
5. Merging the Wi-Fi
The app now asks you to enter the password for your router’s 2.4GHz Wi-Fi network. This allows the range extender to connect its own 2.4GHz Wi-Fi signal to the 2.4GHz signal of our main router.
You’ll also need to repeat the process for the 5GHz band as well. Once this is done, the range extender is linked to the router on both Wi-Fi bands, and this allows the range extender to act as a kind of relay so that your computers and mobile devices in rooms that normally have poor Wi-Fi can now link to your router via the range extender.
6. Network names
This is where things can get a little confusing. At the start of the set-up process, the range extender’s Wi-Fi network was called TP-Link_Extender on both the 2.4GHz and 5.0GHz bands.
But now that the range extender is linked to our router, the app changes the name of the range extender Wi-Fi to use the same name - 0606 Hyperoptic - as our router’s Wi-Fi network.
However, it adds ‘EXT’ on the end - 0606 Hyperoptic 1GB Fibre 5G_EXT - so that you can still tell the range extender’s new network apart from the router’s normal network.
7. Halfway house
That’s a bit confusing, but the app does allow you to change the name of the range extender network to something that’s easier to remember. Let’s keep it simple by calling it 'Range Extender 2.4GHz' and 'Range Extender 5.0GHz'.
Just remember, though, that the range extender is still siting right next to our router, so it’s now time to unplug the range extender and move it further away. You should start by positioning it about halfway between the router and the room or other location that where you need to boost the Wi-Fi signal.
8. Location, Location, Location
Now take a look at the range extender’s app. At the moment, we’ve got the range extender positioned about halfway between our main router and our home office where the Wi-Fi signal tends to be a bit weak.
However, the app is telling us that there’s a very good connection between the router and the range extender, so we can still move the range extender further away from the router without losing the connection. The TP-Link app also includes a ‘location assistant’ feature that can help you to find the best location for the range extender.
9. Moving out of range
If we go back to our smartphone’s Wi-Fi Settings panel, we can now see that we have two distinct networks - the main router (0606 Hyperoptic) on both 2.4GHz and 5.0GHz bands, and the Range Extender network, which is also on 2.4GHz and 5.0GHz bands.
If you move into a room that can’t pick up the Wi-Fi from the router then you can switch to the Range Extender network to improve reception.
You’ve already entered the router’s Wi-Fi password into the app, so you don’t need to do this again. However, you do still need to select the Range Extender network each time you go back to that room with the dodgy Wi-Fi.
10. Finishing up
Switching between networks isn’t too much problem for a single device, such as a laptop that may spend most of its time in a bedroom or office. However, it can be a bit of a chore with smartphones and tablets that move around a lot more.
Some of the more expensive range extenders - such as Netgear’s new EAX80 model - can eliminate this problem by merging their own Wi-Fi network with the network from your main router.
This is called ‘roaming’ as it allows you to automatically switch between the router and the range extender, depending on which one is closer and provides the strongest Wi-Fi signal.


