Not everyone can afford the latest Wi-Fi mesh technology, but not everyone needs it. If fast throughput performance is vital, you can expect to pay around a few hundred dollars for a system like the $329.99 Asus ZenWiFi AC CT8. If you’re looking to upgrade to a whole-home mesh network but have limited funds, consider the Vilo Mesh Wi-Fi System ($59.99). Priced at just under $60, the Vilo is easily the most affordable dual-band 802.11ac mesh system we’ve tested. Granted, it doesn’t use Wi-Fi 6 technology and it doesn't deliver stellar throughput performance, but it gets the job done as long as you aren't planning to stream lots of high-res video or download large blocks of data.
1,500 Square Feet of Coverage for $19.99
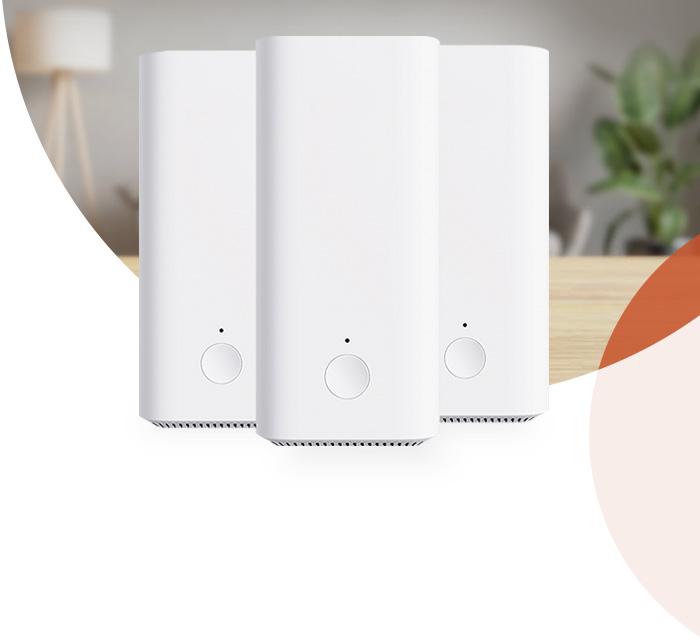
The Vilo Mesh comes with three identical nodes that provide coverage for homes of up to 4,500 square feet. If you don’t require that much coverage, a single node that covers up to 1,500 square feet can be had for just $19.99. Each node has a matte white finish, measures 5.9 by 2.7 by 2.7 inches (HWD), and is equipped with three gigabit LAN ports and four internal antennas. (You won’t find any multi-gig ports or USB ports on this system.) There’s mesh button on the front of each node used for pairing, as well as a tiny LED that is solid blue when the node is connected to the internet, solid red when starting up, flashes blue when internet connectivity is intermittent, flashes amber during the pairing process, and is solid amber when the node is ready to be configured.
This is a dual-band Wi-Fi 5 (802.11ac) system that can reach maximum speeds of up to 300Mbps on the 2.4GHz band and up to 867Mbps on the 5GHz band. It doesn't support the latest Wi-Fi 6 technologies, but it does support MU-MIMO simultaneous data streaming, direct-to-client beamforming, and automatic band steering. It’s powered by a 999MHz MIPS processor, 128MB of RAM, and 16MB of flash memory. The system comes preconfigured for wireless backhaul, but you can use a wired backhaul configuration if you prefer; however, you’ll have to reset the satellite nodes to their factory defaults after they’ve been installed.
The system is installed and managed using the Vilo Living mobile app for Android and iOS devices. The app opens to a My Networks screen that shows the name of the Vilo network and how many nodes and devices are connected. Tap the network to open a screen with a large System Dashboard button and panels labeled Vilos, Devices, Parental Controls, Guest Wi-Fi, Usage Report, and Restart Wi-Fi.
When you tap the Dashboard button, it opens a screen that displays the current firmware version, encryption method (WPA, WPA2), Wi-Fi signal strength, and device signal strength. Here you can also enable or disable band steering and optimize channel bandwidth. Tapping the Vilos panel takes you to a screen that lists each node by name. Tap any node to see its IP and MAC addresses, how it's connected (wired, wireless), and which clients are connected to it.
The Devices panel allows you to see which clients are currently connected to the network, their IP and MAC address, and which node they're connected to. There’s also a button for turning internet access on and off for each client, and a usage report that shows you how much bandwidth the client has used on a daily, weekly, and monthly basis.
Parental Controls are very basic. You can allow or disallow internet access for any device and schedule internet on and off times, but you don’t get any of the age-based content filters that you get with pricier systems. Moreover, the Vilo system lacks the anti-malware and QoS (device prioritization) tools that come with many mesh systems.
Tap the Guest Wi-Fi panel to enable a guest network with a custom Wi-Fi name and password and a specific active duration period, and tap the Usage Report panel to view daily, weekly, and monthly data usage reports for all nodes and clients. To change Wi-Fi settings, enable notifications, configure internet settings, and update firmware, tap the three dots in the upper right corner.
Vilo Mesh Installation and Performance
Mesh Wi-Fi systems are known for their quick and easy setup process, and the Vilo system is no different. I downloaded the mobile app, created an account, and tapped Add Vilo. Following the instructions, I plugged one node into a wall outlet and connected it to my modem using the included LAN cable. After a few seconds the LED went from red to amber, and I was prompted to scan the QR on the base using my phone’s camera. After a few more seconds the node was connected and I gave the new network a name and a password. I tapped Add Another Vilo, tapped Add to an Existing Network, and selected From the Same Package. Since the system is preconfigured, all I had to do was plug in each node and wait one minute for the LED to turn blue, at which point I gave it a name to complete the installation.
The Vilo is a budget-class mesh system and it performs like one. The main router's speed of 347Mbps on our close-proximity (same room) throughput test was 108Mbps slower than the Meshforce M7 router and 174Mbps slower than the EnGenius ESR580, while the Asus ZenWiFi AC CT8 notched an impressive 549Mbps. On the 30-foot test, the Vilo router node fared a bit better: It managed 207Mbps, beating the Meshforce M7 and EnGenius ESR580 routers by a slim margin (205Mbps and 198Mbps, respectively). The Asus ZenWiFi AC CT8 led with a speed of 228Mbps.
Results were similar with the Vilo satellite node. Its speed of 175Mbps was significantly slower than the Asus ZenWiFi AC CT8 node (441Mbps), and trailed both the Meshforce M7 (323Mbps) and the EnGenius ESR580 (222Mbps) nodes on the close-proximity test. The Vilo node’s speed of 140Mbps at a distance of 30 feet couldn’t catch the Meshforce M7 (298Mbps) or the EnGenius ESR580 (178Mbps), and once again the Asus ZenWiFi AC CT8 led with 329Mbps.
We use an Ekahau Sidekick diagnostic device and Ekahau’s Survey software to measure Wi-Fi signal strength. (Note: Ekahau is owned by Ziff Davis, the publisher of PCMag.com.) This combination generates a heat map that shows signal penetration throughout our test home.
On the map above, the white circles represent the location of the router and the satellite node, and the colors represent signal strength according to the scale at the bottom of the screen. Dark green indicates the strongest signal, yellow is weaker, and gray indicates no signal reception. As shown on the map, the Vilo system did a relatively good job of providing a strong Wi-Fi signal throughout our test home, with only a slight weakening in the lower area of the kitchen.
Not the Fastest, But the Most Affordable Mesh You'll Find
With the Vilo Mesh Wi-Fi System, you can extend your home’s wireless coverage for far less than $100 as long as you're willing to use older Wi-Fi technology with middling throughput performance. As with most mesh systems, the Vilo is easy to install and its mobile app makes it simple to manage and assign basic parental controls, but it lacks malware protection and QoS settings. At $20 per node, it’s an unbeatable value as long as you’re not looking to stream 4K video or download big blocks of data. However, if you do a lot of online gaming and movie streaming, you’ll need a more powerful mesh system like the $329.99 Asus ZenWiFi AC CT8. Granted, it costs hundreds of dollars more than the Vilo system, but it’s a top performer and is loaded with features including rich parental controls, malware protection, and USB connectivity.


